-1.png?height=120&name=Confido%20-%20Trademark%20-%20Dark%20(2)-1.png)
This article covers how to automatically text Confido Legal payment links to clients using Twilio and Zapier.
Prerequisites
- Create a Zapier account. You will need to have a Zapier Starter account package or higher.
- Create a free Twilio account and buy a phone number ($2/month at the time this article was published).
- You have a basic understanding of how Zapier works. To get up to speed, see this article.
Create Your Trigger
- Open Zapier and click Create a Zap.
- The first step is to create your trigger. To do this, you need to determine when you want to send a client a text message. Maybe it's after they book an initial consult through your online scheduling tool. Maybe it's when you add the client to your overdue balance client list in Google Sheets. Maybe it's when a new bill is created in Clio. Whatever your trigger, it must contain the following data:
- Client name
- Amount of the payment (not necessary if it will always be the same amount e.g. a $250 flat fee for an initial consult)
- Client phone number (not necessary if you already have this populated on the client record in Confido Legal)
- In this example, our Trigger will be an email coming in to our Gmail inbox with a certain label. In the image below, the Trigger will initiate the workflow when a new email comes in with a Gmail label of "Demo Mode."
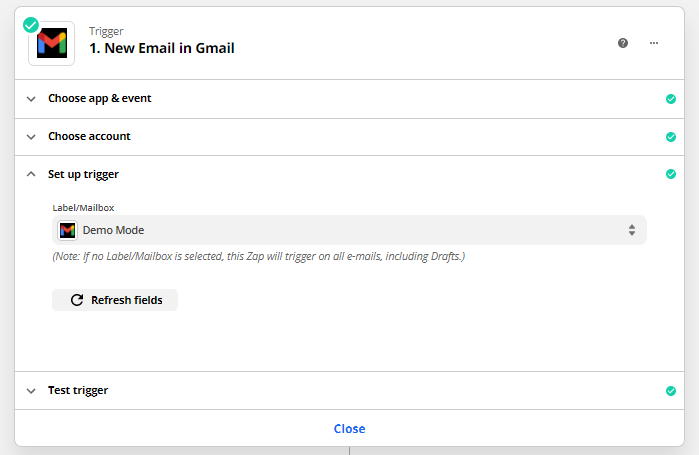
- Test your trigger to ensure it is working properly.
Find or Create a Client in Confido Legal
Note: If you do not need to associate the text payments to a client in Confido Legal, you can skip this step and the following step. Skip ahead to the section Send a Text Message Payment Request. Instead of entering the Result Paylink URL as the link to pay, create a Standing Link in Confido Legal and populate the body of the text message with that Standing Link.
- The next step is to associate the payment with a client. This can be a client that has already been created in Confido Legal, or it can be a new client.
- Click on the + button in Zapier to add an Action after your Trigger.
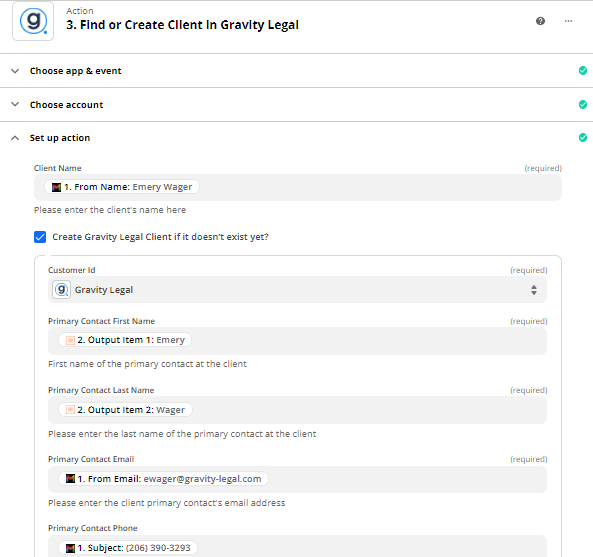
- Select Find or Create Client in Confido Legal.
- Populate the fields required by Zapier. In the example below, the client name is the From Name of the Trigger email. The email address is the From Email, and the phone number has been entered in the Subject.
- Test your Zap. You should see the information from your Trigger flow through properly to the Action. In this case, Zapier should either find a client in Confido Legal or create a new one if a client with that name does not yet exist in Confido Legal.
Send Payment Request
- This heading is a bit of a misnomer. In this step, you are actually just going to generate the payment request, but you're not going to send it anywhere (we'll do that in the final step).
- Click on the + button in Zapier to add another Action after Find or Create Client in Confido Legal.
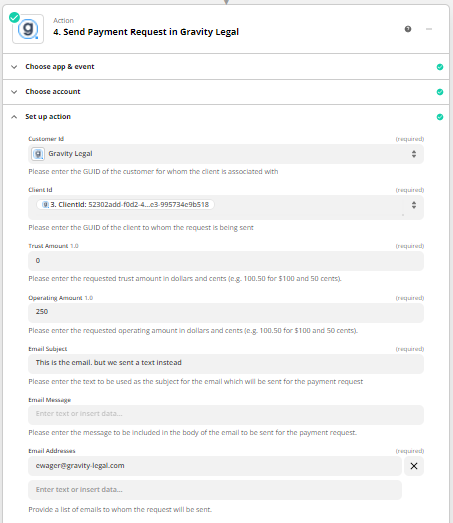
- Select Send Payment Request in Confido Legal.
- Populate the fields required by Zapier. In the example below, the ClientID is the ID of the client selected or created in the previous step. The amount of the payment here is fixed, however if you would like the payment to be a variable amount, add the relevant amount field from the Trigger step to either the Trust Amount or Operating Amount fields. The email address can be a no-reply email or an internal email. Since we are not actually emailing this request to the client, it should not be the client's email.
- Test your Zap. You should see a payment link show up in Confido Legal of the desired amount and associated with the correct client. If you entered your email in the Email Address field, you should also have received the payment request email.
Send a Text Message Payment Request
- Now we are going to take the data from the previous step and turn it into a text message to send to the client.
- Click on the + button in Zapier to add another Action after Send Payment Request in Confido Legal.
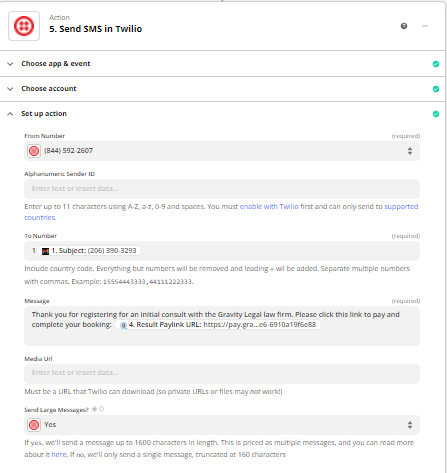
- Populate the fields required by Zapier. In the example below, the From Number is the number your purchased in Twilio. The To Number is flowing through from the Trigger (although it could also come from the Confido Legal client if a valid phone number was associated with the record in Confido Legal). Don't forget to add the country code of the To Number. In the Message field, add the Result Paylink URL generated in the previous section.
- Before testing your Zap, ensure the phone number for the test request is one that you own.
- Test your Zap. If you have set it up correctly, you should receive a text message that includes a payment link. In our example, it looks like this:

- If everything looks good, turn on your Zap and start texting!